How to Use Pressure Stall Information (PSI) Metrics in Kubernetes v1.36+
Introduction
Monitoring resource contention in Kubernetes has long relied on simple utilization metrics—CPU percentage, memory usage, I/O rates. But these numbers alone can mask the real pain: tasks waiting in line. Pressure Stall Information (PSI), introduced in the Linux kernel in 2018 and now graduated to General Availability (GA) in Kubernetes v1.36, provides precise signals of resource saturation before it turns into an outage. PSI tells you the percentage of time that tasks are stalled on CPU, memory, or I/O resources, capturing both cumulative totals and moving averages (10s, 60s, 300s windows). This guide walks you through enabling, accessing, and interpreting PSI metrics in your Kubernetes cluster so you can detect and diagnose resource pressure early.
What You Need
- A Kubernetes cluster running v1.36 or later — The KubeletPSI feature gate is enabled by default starting with this release.
- Linux kernel 4.20+ with PSI support — Most modern distributions (Ubuntu 20.04+, RHEL 8.2+, etc.) ship with
CONFIG_PSI=y. Verify withcat /proc/pressure/cpu. - kubectl access to run commands against the cluster.
- Optional: Prometheus and Grafana for long-term trend analysis.
- Basic familiarity with cgroups (v2) because PSI readings originate there.
Step 1: Verify Linux Kernel PSI Is Active
PSI must be enabled at the kernel level. On each node you plan to monitor, run:
cat /proc/pressure/cpu
cat /proc/pressure/memory
cat /proc/pressure/io
If you see output like some avg10=0.00 avg60=0.00 avg300=0.00 total=0, PSI is working. If the files don't exist, PSI is not compiled or disabled. Check kernel config: zgrep CONFIG_PSI /proc/config.gz. If missing, you need a kernel rebuild or a different distribution.
Step 2: Enable the KubeletPSI Feature Gate (if not already)
In Kubernetes v1.36, the KubeletPSI feature gate is enabled by default. But if you are on an earlier version or have custom kubelet configuration, ensure it's turned on. Edit the kubelet configuration file (often /var/lib/kubelet/config.yaml) and add:
featureGates:
  KubeletPSI: true
Then restart the kubelet:
systemctl restart kubeletTo confirm the feature is active, check the kubelet logs for a line like PSI metrics collection enabled.
Step 3: Access PSI Metrics from the Kubelet
The kubelet exposes PSI metrics on its metrics endpoint (default port 10250). Query node-level pressure:
kubectl get --raw /api/v1/nodes/<node-name>/proxy/metrics | grep psiYou'll see metrics like:
node_psi_cpu_stalled_seconds_totalnode_psi_memory_stalled_seconds_totalnode_psi_io_stalled_seconds_totalnode_psi_cpu_pressure_avg10,avg60,avg300
To drill down to pod and container levels, use the container_psi_* series. For example:
container_psi_cpu_pressure_avg10{container="my-app",namespace="default"}Step 4: Interpret PSI Metrics Correctly
Understanding what PSI numbers mean is key. There are two types of pressure per resource:
- some — At least one task is stalled on the resource.
- full — All non-idle tasks are stalled (more severe).
Each metric comes with moving averages over 10, 60, and 300 seconds. A high 10-second average indicates a transient spike; a consistently high 300-second average signals sustained contention. The total field is the cumulative stalled time in microseconds since boot.
Example: If node_psi_cpu_pressure_avg10 is 15.3, it means over the last 10 seconds, an average of 15.3% of time tasks were waiting for CPU. This is far more informative than raw CPU utilization, which might show 80% but hide scheduling delays that cause PSI to spike.
Step 5: Set Up Continuous Monitoring
Prometheus can scrape these metrics. Add a scrape target in your prometheus.yml:
scrape_configs:
  - job_name: 'kubelet-psi'
    metrics_path: /metrics
    scheme: https
    tls_config:
      insecure_skip_verify: true
    bearer_token_file: /var/run/secrets/kubernetes.io/serviceaccount/token
    kubernetes_sd_configs:
      - role: node
Then create Grafana dashboards using the PSI metrics. Alert on thresholds: for example, if avg60 exceeds 50 for memory, it may indicate imminent OOM.
Step 6: (Optional) Tune for Production Scale
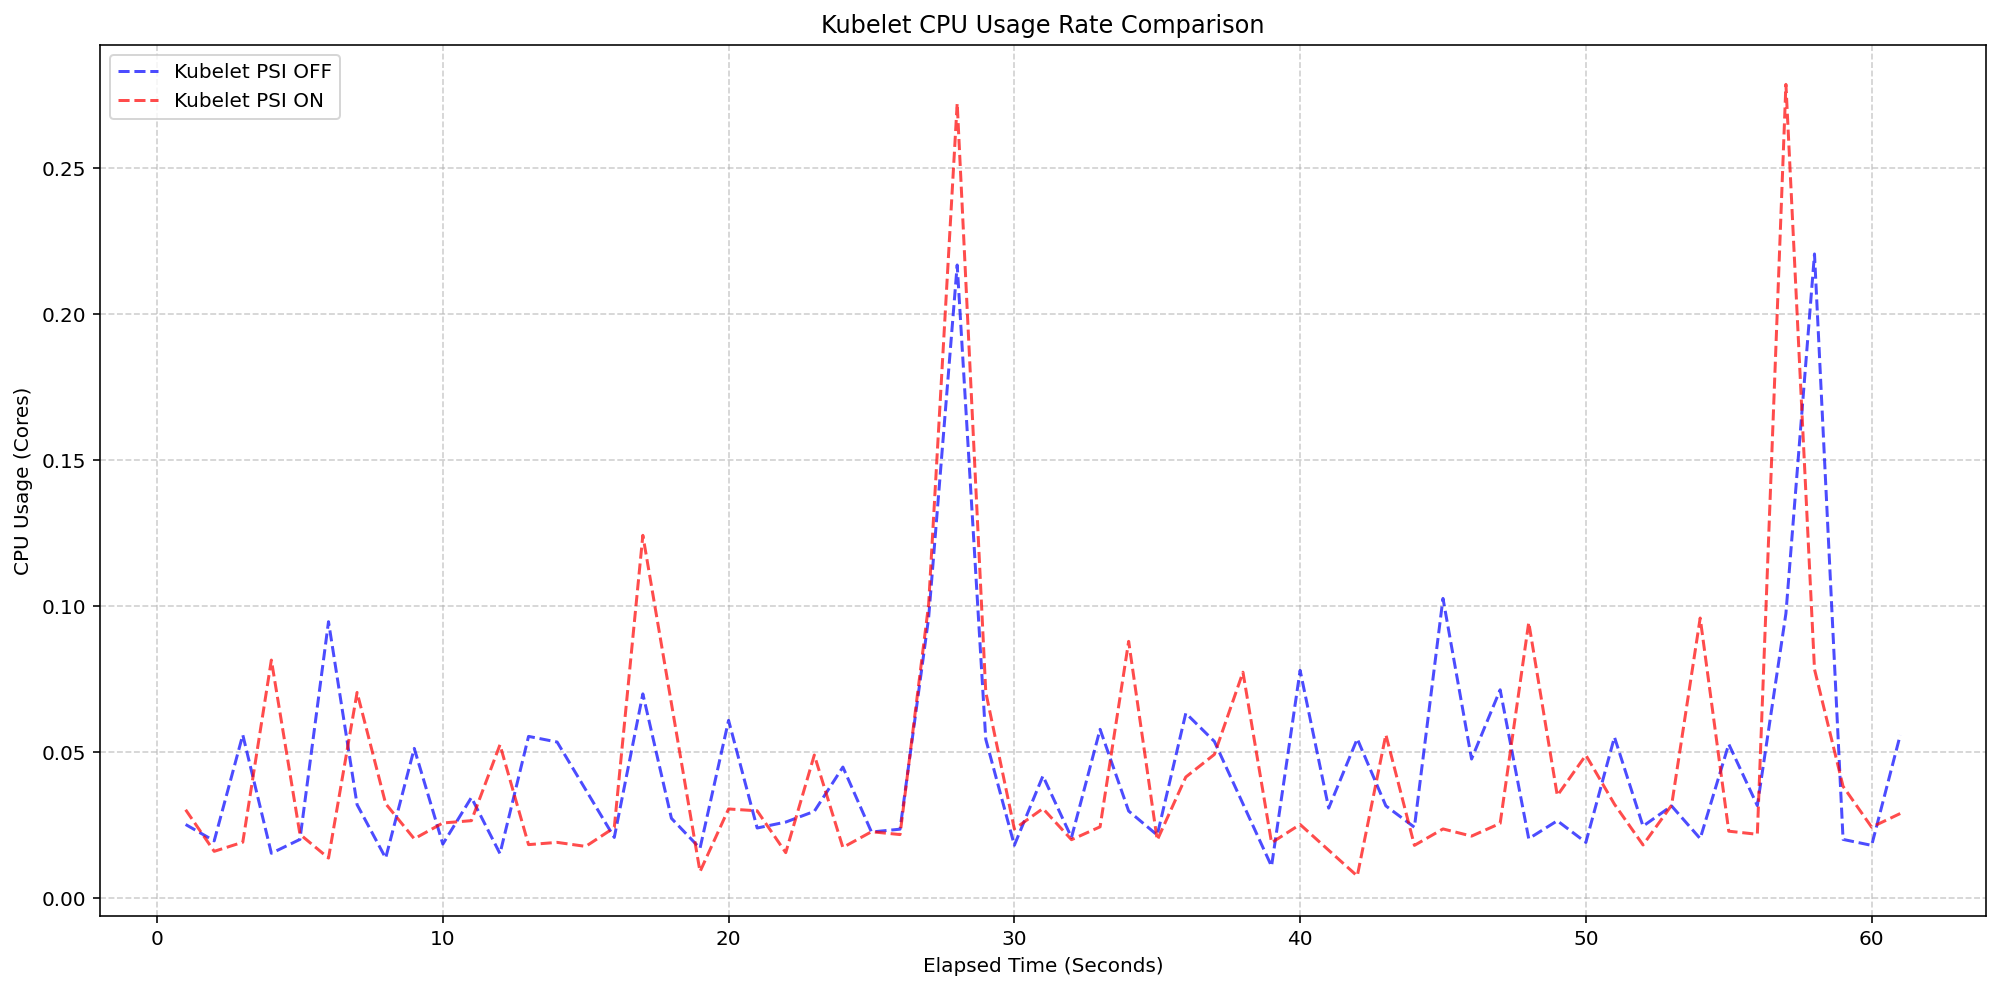
SIG Node's performance testing (detailed in the Kubernetes v1.36 release blog) showed that enabling PSI collection adds negligible overhead—less than 2.5% of CPU on a 4-core node with 80+ pods. The kubelet's polling logic is lightweight and blends into standard housekeeping. No extra tuning is required, but if you run on very small nodes (<2 cores), you can disable the feature gate if needed (not recommended).
Tips
- Differentiate between PSI and traditional utilization: A node with 90% CPU utilization but 0% PSI is healthy—tasks are not waiting. Conversely, 50% CPU with 20% PSI means contention is real.
- Use the full metric for severity: The 'full' metric (all tasks stalled) is a stronger indicator of trouble than 'some'. Correlate both.
- Watch memory PSI closely: Memory pressure often precedes OOM kills. Set alerts on
avg10> 30 for memory full pressure. - Integrate with existing dashboards: Replace or supplement CPU utilization gauges with PSI moving averages to get a clearer picture.
- Remember PSI is cgroup-aware: If you use cgroup v2, pod-level metrics reflect only the processes within that pod, useful for noisy-neighbor detection.
- Stay updated: As Kubernetes evolves, PSI metrics may gain additional fields. Check the Kubernetes changelog for each release.
Related Articles
- Ubuntu's Ordeal Continues: Twitter Account Hijacked After DDoS Assault
- Linux Kernel Sees Major Changes: Famfs Filesystem, Python Packaging Reforms, and 7.1 Merge Window Launch
- How to Test Sealed Bootable Container Images on Fedora Atomic Desktops
- 10 Critical Facts About the Quasar Linux RAT Threatening Developer Systems
- Managing Memory Outside the Kernel's Direct Map: New Challenges and Approaches
- How to Enable and Test the New AMDGPU Power Module in Linux 7.2
- 9 Essential Highlights of Fedora Linux 44: What Every User Needs to Know
- Linux Kernel Introduces Emergency Kill Switch for Vulnerable Functions